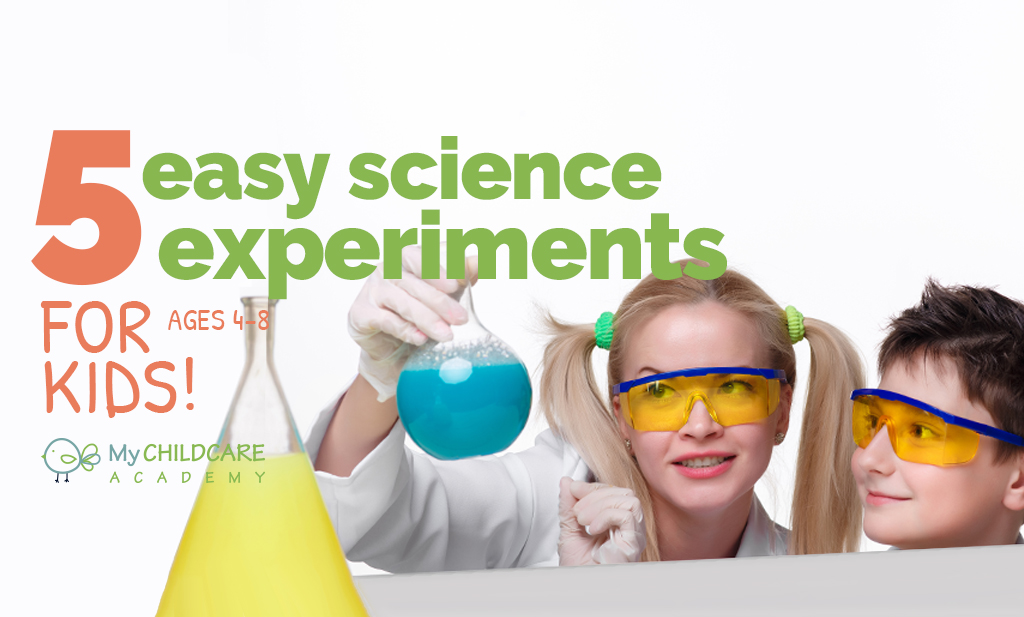
5 Easy Science Experiments for Kids
Are you looking for some fun science experiments for kids? Whether you’re homeschooling or looking to have some fun at home, an enjoyable activity while learning about science sounds like a win! In this blog, we’re going to talk into detail about the materials needed, how to perform the experiments, and how to explain the experiment to your child. While all of these experiments are safe, please do not let your child(ren) perform them without an adult present. Let’s start learning!
1. Neon Flower: Experimenting with Transpiration, Cohesion, and Capillary Action

This fun experiment is a way to show your children exactly what plants do with the water we give them. They’ll be able to see the flowers change colors and become more vibrant the longer they’re placed in the water! Let’s get started!
Here are the material you will need:
- 3-6 white flowers (we recommend thick-stemmed Gerbera Daisies)
- Food coloring
- 4 glasses
- Water
Now, here are the steps to dying your flowers:
- Fill the four glasses with water.
- Squeeze 30 drops of desired food coloring into the four glasses and stir.
- Trim the flowers to fit in the glass.
- Gently place your flowers in your die.
- Watch your flowers change colors!
How To Explain the Science Behind Biocolor Flowers
Plants “drink” their water through their roots. Once inside the stem, tiny tubes that run up the stem called xylem serve as a transportation for the water to get to the plant’s leaves and flowers. A few of the processes that help the water travel up through the xylem are: transpiration, cohesion, and capillary action.
There are two things that combine to move water through plants — transpiration and cohesion. Transpiration occurs when the water evaporating from the leaves, buds, and petals pulls water up the stem of the plant. Cohesion is when the water that evaporates from the leaves “pulls up” other water molecules behind it to fill the space it left. This water movement process where plants are able to defy gravity and pull water up and into their leaves and flowers through tiny tubes is called capillary action.
2. A Volcanic Eruption: Experimenting with Acids and Bases
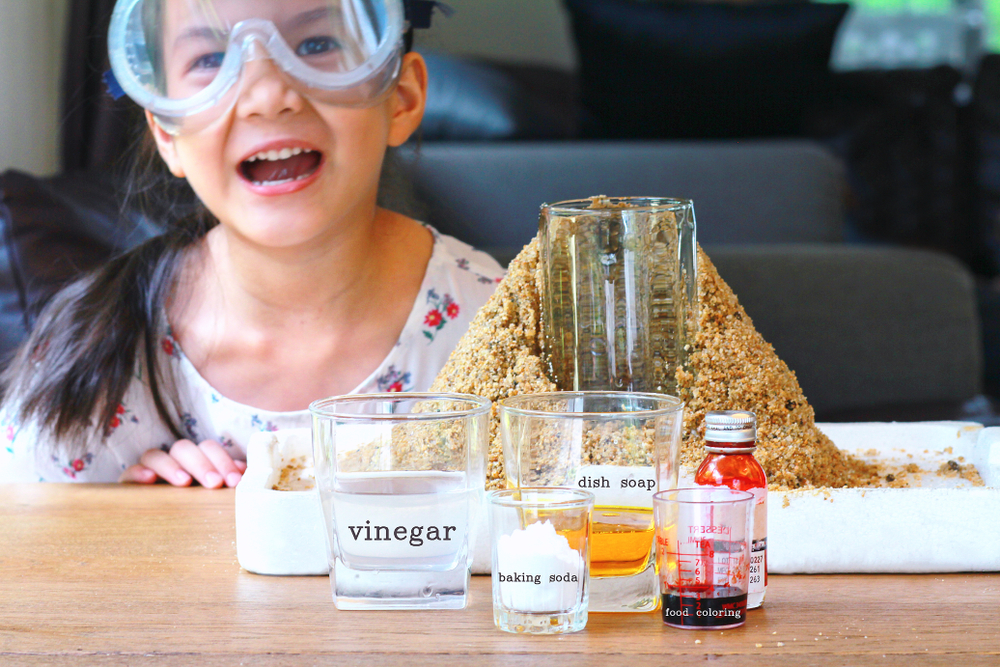
Creating a volcanic eruption to talk about acids and bases? Count us in! This activity can have your child(ren) engaged and excited to learn all about the eruption process. After getting the experiment ready, make sure to “erupt” your volcano outside to avoid cleaning up a mess or potentially damaging things inside the home. Let’s get learning!
Here are the materials to start this experiment:
- 10 ml of dish soap
- 100 ml of cold water
- 400 ml of white vinegar
- Food coloring (whatever color)
- Baking soda slurry (fill a cup about ½ with baking soda, then fill the rest of the way with water)
- Empty 2 liter soda bottle
Now, let’s talk about the steps to creating a volcanic eruption:
- Combine the vinegar, water, dish soap and 2 drops of food coloring into the empty soda bottle.
- Use a spoon to mix the baking soda slurry until it’s all a liquid.
- Pour the baking soda slurry into the soda bottle quickly and step back to see acids and bases react!
How To Explain the Science Behind This Volcanic Eruption
A chemical reaction is when one or more substances are combined to form one or more substances. In this case, when vinegar (one substance) and baking soda (another substance), combine, a chemical reaction takes place to produce a gas called carbon dioxide (resulting substance).
Have you ever experienced a coke getting too shook up so much that when you open it, the coke sprays everywhere? This is the same method! There isn’t enough room in the bottle for the gas to spread out so it leaves through the opening super quick causing an eruption!
3. Growing A Bean: Experimenting with Germination
Growing a bean can certainly take time. This experiment will be a fun process for your child(ren) to check up on regularly! They’ll love seeing the steps and watching their bean sprout every day. Once it gets to a certain point (around two weeks), you are more than welcome to transplant it into a garden or bigger pot. Give it a try!
The materials for this experiment are:
- 1 pinto bean
- 1 paper towel
- 1 Ziploc bag
- Spray bottle for holding water
Here are the steps for growing your bean:
- Dampen paper towel with spray bottle
- Place wet paper towel in Ziploc Bag
- Place your bean on top of wet paper towel
- Close Ziploc Bag
- Place Ziploc Bag in a warm, sunny spot (window seal is a good place)
- Add water to paper towel when it dries out
- Observe your plant growing in 3-5 days!
How To Explain the Science Behind Your Blossoming Bean
This experiment is all about germination! This means that the plant is sprouting it’s roots. Usually when planting flowers or vegetables you can’t see the sprouts because they’re under ground in the soil. In this experiment, the bean is getting a moist place to grow plus some sun so you can see the whole process right before your eyes! If you want to observe more, place another bean sprout in a dark area to compare the two.
4. Crystal Candy: Experimenting with Crystallization
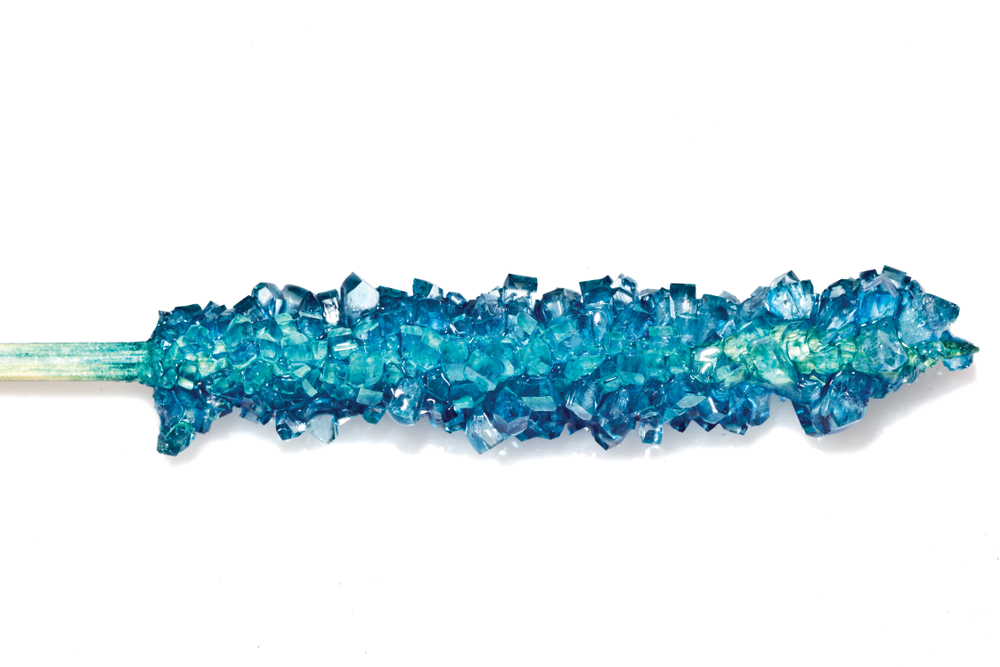
Looking for an experiment that’s both educational and tasty? Try this crystallization experiment! Whether you make a necklace out of the crystals, observe them, or eat them, these magical growing crystals can be a hit for your child(ren).
The materials for this experiment are:
- A piece of thick string, about 6 inches
- A pencil or popsicle stick
- A paper clip (or large plastic bead)
- 1 cup of water
- 2 cups of sugar
- A mason jar
Here are the steps for your crystal candy:
- Tie one end of the string to the middle of the popsicle stick or pencil.
- Tie the other end around the paper clip or bead.
- Next, lay the popsicle stick or pencil across the top of a jar so that the string hangs down the middle of the jar. Make sure that it’s not touching the bottom (but close) or the sides of the jar. The string will act as a seed for the crystal. After this, remove them from the jar and set them aside to use later.
- Pour the water into a pan and bring it to boil.
- Add 1/4 cup of sugar to the boiling water, stir it until it dissolves.
- Repeat this step until all of the sugar has been dissolved. This will take time and patience and it will take longer for the sugar to dissolve each time. Be sure you don’t give up too soon in order to make a “supersaturated solution!”
- Carefully pour the hot sugar solution into the jar and fill it almost all of the way to the top. Please do not let your child do this themselves!
- Put your pencil or popsicle back on top and lower the bead or paperclip back inside of the jar, just like you practiced before. Allow the jar to cool and put it someplace where it will not be disturbed.
- Next, it’s time to wait. Check on it every day to see the crystals start to grow, but be very careful not to disturb it. The longer you wait the bigger it will get.
How To Explain the Science Behind Your Crystal Candy
Mixing the water and the sugar creates a supersaturated solution! This is because the water could only hold the sugar if both were very hot. As the water cools the sugar “comes out” of the solution and forms back into sugar crystals on your string. The string and paper clip act as a home that the crystals can start to grow on. With some luck and patience, you’ll create some magical crystals! Enjoy!
5. Storm in a Glass: Experimenting with the Water Cycle
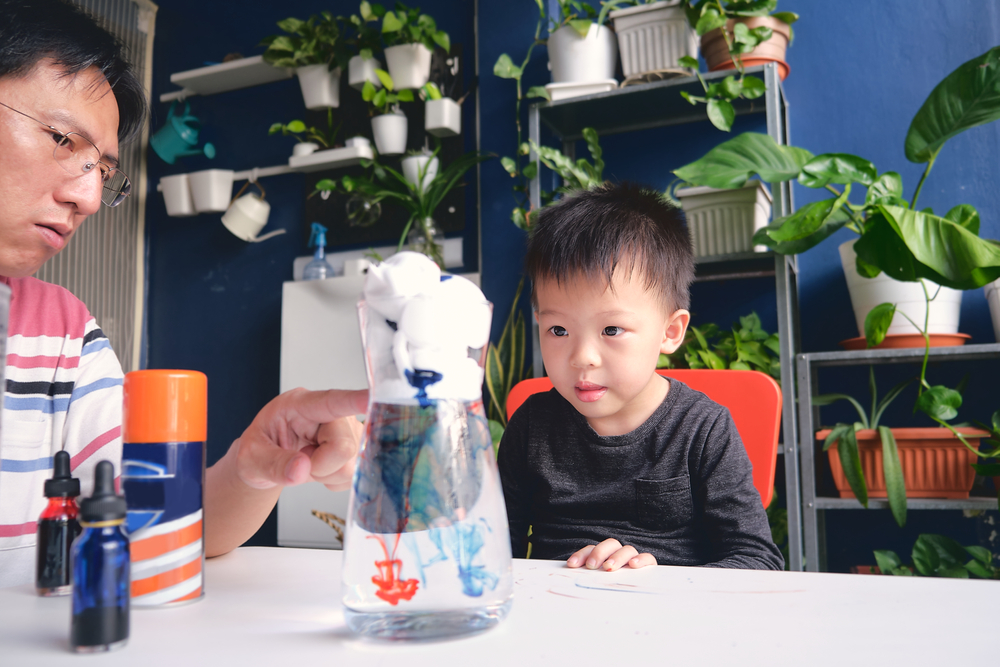
Wanting to educate your child(ren) on the water cycle? This “storm in a glass” experiment will be a fun way to explain how clouds work and why they cause a storm. Let’s learn more!
The materials for this experiment are:
- Shaving cream
- A large glass
- Water
- Food coloring (blue)
- A spoon
The steps to create your storm in a glass are:
- Fill the glass 1/2 full with water
- Spray some shaving cream on top of the water to fill the glass to ¾ full.
- Use your finger or a spoon to spread the shaving cream evenly over the top of the water.The top of the shaving cream should be flat.
- Mix ½-cup water with 10 drops of food coloring in a separate container.
- Gently add the colored water, spoonful by spoonful, to the top of the shaving cream. When it gets too heavy, watch it storm!
How To Explain the Science Behind Your Storm in a Glass
Those big white things in the sky are called clouds, and they hold water. Actually, they can hold millions of gallons of water! In our experiment, the layer of shaving cream is our pretend cloud. The shaving cream layer also holds water. Once too much water gets in the cloud, they get really heavy and ultimately the water falls out of the cloud as rain, snow, sleet, or hail. This is called precipitation!
Explore My ChildCare Academy
Searching for a daycare that sees the importance of science and alternative methods of learning? At My Childcare Academy, we believe that these two aspects are a big part of child development. Call us today to learn more about us and how we can help your child learn and grow!