Buckle Up! The Ultimate Car Seat Safety Checklist for Parents
Everybody knows that wearing a seatbelt is vital to staying safe while in a vehicle. We put our children in car seats in the hopes that they’ll stay safe. As parents, their safety is our responsibility and there are times when we ask ourselves, “Am I doing enough?”
The answer to that question isn’t ours to answer. As you analyze that question for yourself, take the following statistics into consideration.
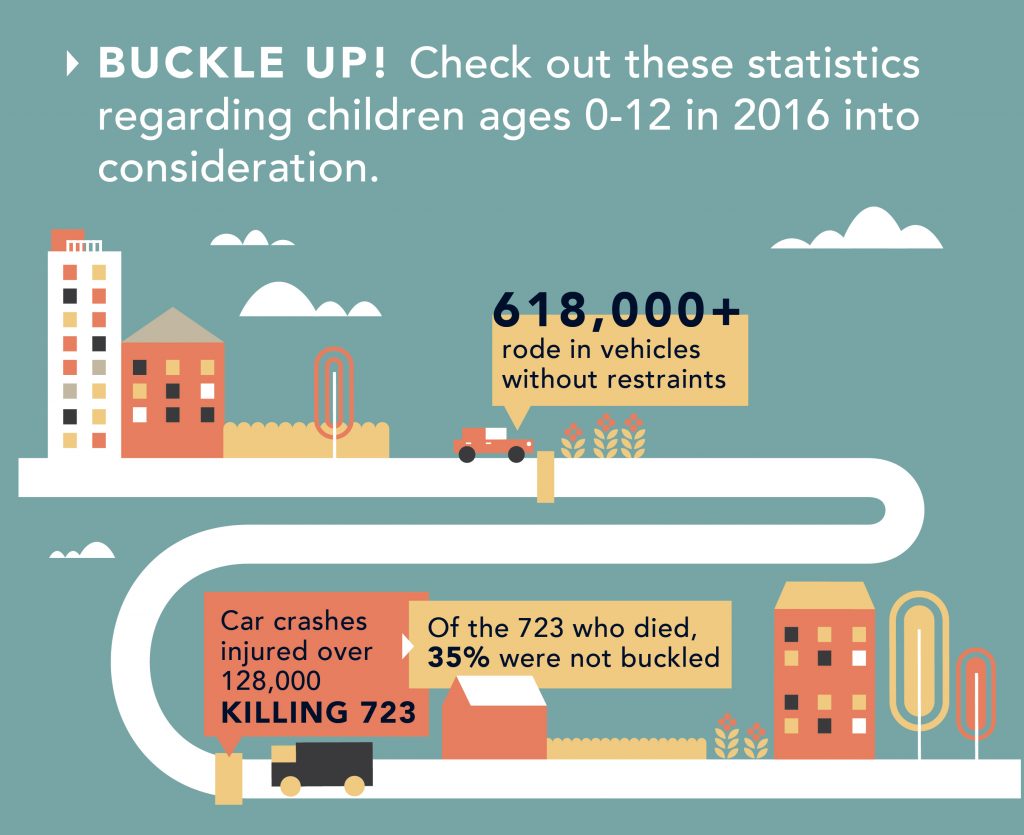
The overarching question is thus: Is your child buckled up when they are in the car? Hopefully, your answer is “Yes!” If not, understand that parenting is a learning process. As parents, we are continuously learning what is best for our children and improving in our roles day-to-day. If you find yourself saying, “I don’t always put my child in a car seat.” or “My child won’t stay buckled.”, don’t beat yourself up over it just yet—it’s never too late for change. You can start practicing good buckling practices with your child today!
Do you already make sure your child is buckled up every time they’re in the car? Don’t stop reading just yet; there might still be some things you may not have realized should still be done. After all, 46% of car seats aren’t installed correctly.
Here’s a checklist that every parent—whether you’re a buckler or not—should follow.
The Car Seat Safety Checklist Every Parent Needs
1. Set the Example

As a parent your child is more likely to stay buckled if you do. If you tend to drive without a seatbelt, they’ll want to mimic you. Your example could save your life as well as theirs.
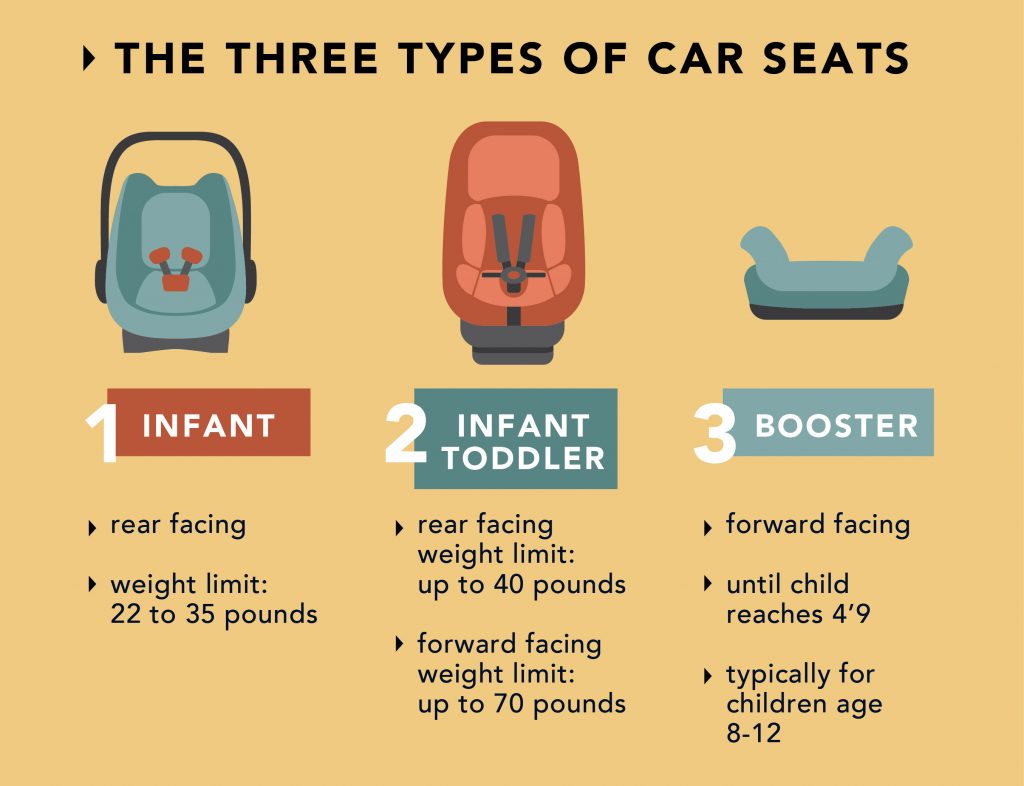
2. Make Sure Your Child is Using the Right Type of Car Seat

As your child grows, he or she will need different types of car seats. Here are the three different types:
3. Place the Car Seat in the Middle of the Rear Seat
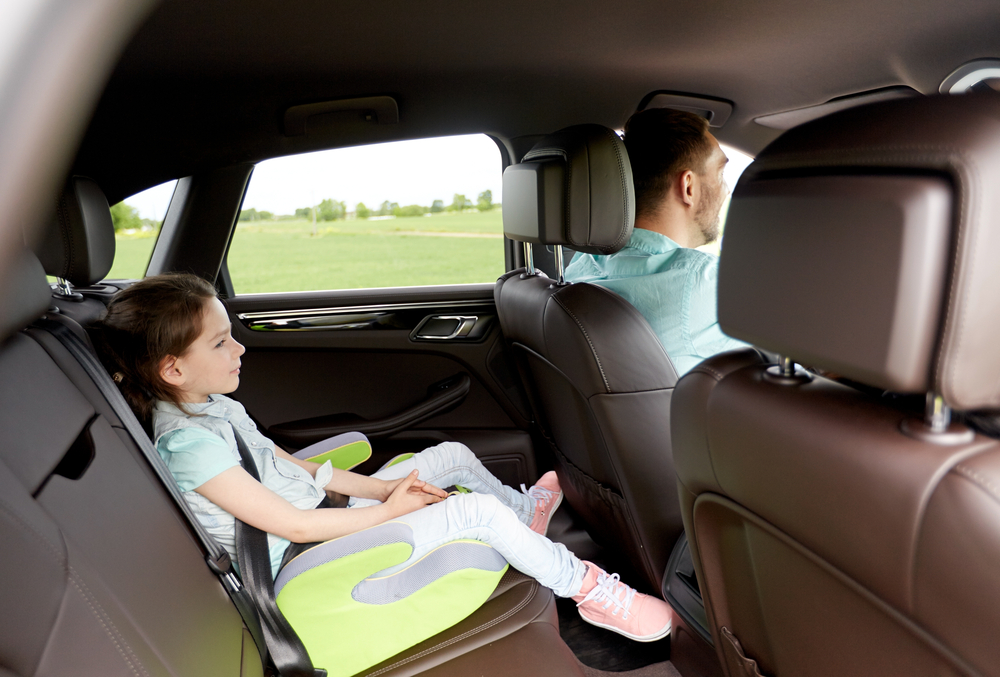
It is very common for parents to place their child’s car seat near the door of the car. After all, that makes it easier to get the child in and out. However, placing your child in the middle of the rear seat gives your child a 43% reduction in risk of injury during the event of a crash.
4. Decide If the Car Seat Should Face Forward or Backwards
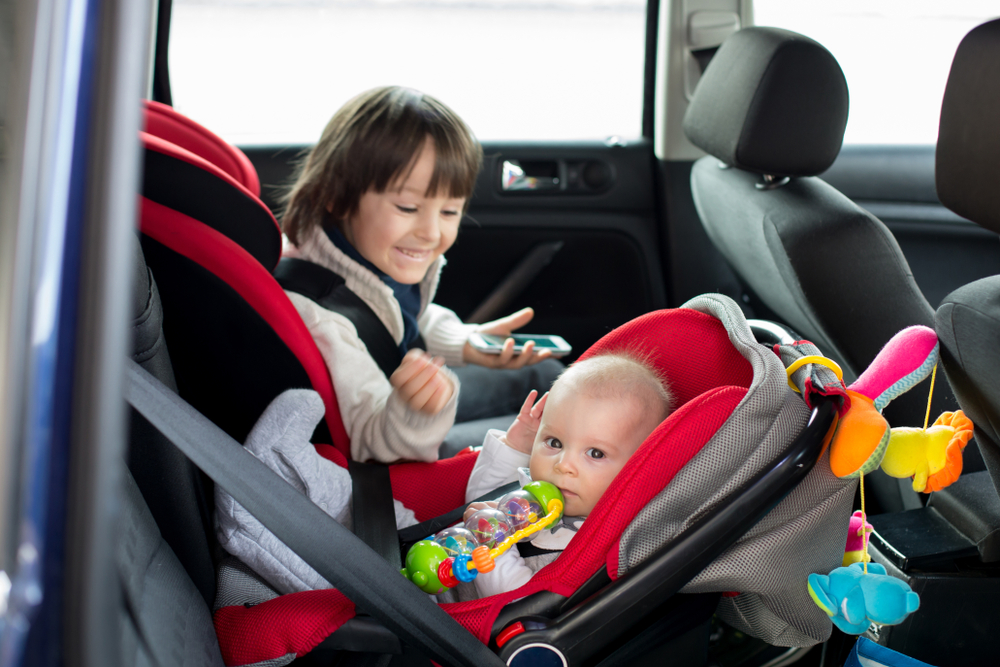
Although it is common to see a newborn baby in a backwards car seat, would you put your two or three year old in one? That is probably less common. However, the American Academy of Pediatrics (AAP) suggests that children be positioned rear-facing until they’ve reached the 40-pound limit of their infant-toddler car seat—which is about the age of four. In fact, health.utah.gov lists putting a child in a forward-facing seat too early as one of the top five most common mistakes that parents make when it comes to their child’s car seat.
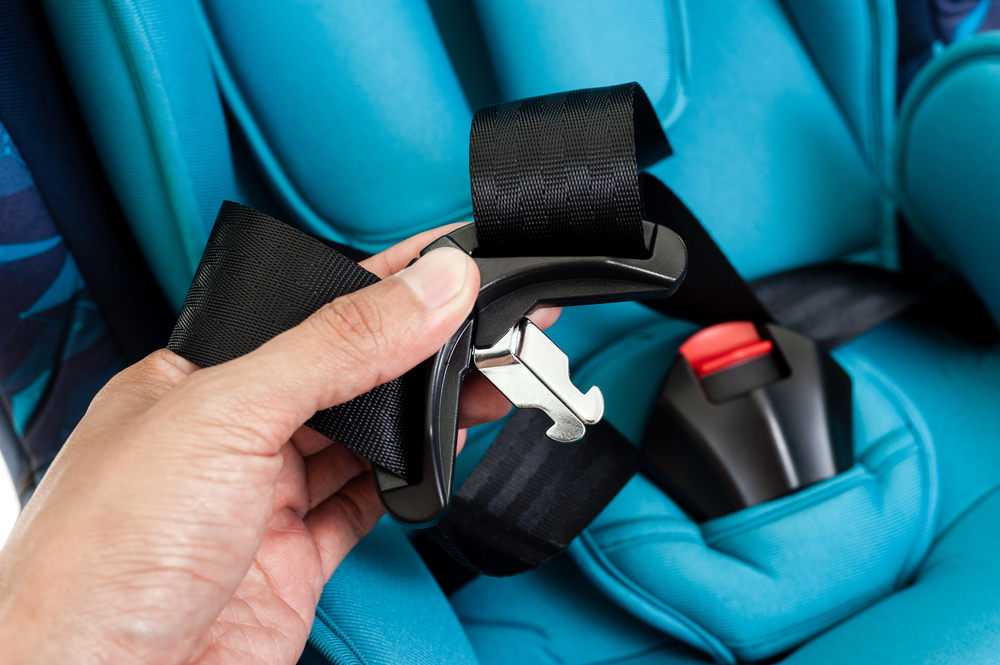
5. Do the Inch and Pinch Test

To make sure your child is properly restrained, perform the following tests:
Inch Test:
Grab the base of the car seat and shake it. If you’re able to move it more than an inch in any direction, then it has not been installed correctly.
Pinch Test:
After you’ve buckled your child, check the straps near your child’s shoulders. You can do this by pinching the strap. If there is any excess webbing, then the restraints are too loose.
6. Have Your Car Seat Inspected by a Certified Technician
There was a time when parents were told to go to their local firehouse to have their car seat installed or inspected. However, not every firehouse has a certified car seat technician on staff. What you should do instead is research who in your area is certified and able to make sure that your child’s car seat is safely installed. Luckily, that research is made easy with the help of this useful PDF provided by the Utah state government. It lists the different counties around the state along with the certified child passenger safety technicians in those areas who you can reach out to and set an appointment with to get your car seat checked or installed properly.
Here is an example of what a CPS technician will do during an infant car seat installation.
7. Don’t Let Your Car Seat Expire!

We all know that food expires and that you should never eat something past its expiration date, right? Well, the same applies to car seats. Each has an expiration date. Make sure you know it! Check the label for the date and circle it with a red permanent marker. Some parents might think that putting expiration dates on car seats is just a gimmick to get you to keep buying them.
The lifespan of a car seat is typically good for six years from the date of manufacturer. Here are several reasons as to why your car seat’s expiration date should be taken seriously:
- Natural wear and tear from your child and from being jerked around in the vehicle.
- Newer car seats have been made utilizing updated crash test data and advanced materials.
- Car seats can actually decay.
- Your car seat’s plastic can become less stable over time due to exposure of extreme temperature lows and highs.
Also, you should know that the expiration date isn’t the only qualifier for getting a new car seat. If you’ve been in any type of car accident, the safety of the car seat may have been compromised, and you’ll need to replace it.
A Message from My Childcare Academy
We love your children and enjoy seeing their bright, smiling faces when they walk through our doors. Because we care for them as we would our own, their safety is our top priority. We hope this checklist will aid you in your own efforts of caring for their well-being.
Would you like to discuss this article further? Feel free to contact us!